
So your itchy feet have got the better of you and you’ve decided you want to climb Kilimanjaro? Excellent decision! But now you’ve got to actually organise and (eeek!) do the damn thing!
I’m not an expert hiker or mountaineer at all. The last time I did anything even remotely similar to climbing Kilimanjaro was 20 years earlier when I huffed and puffed my way along the Inca trail. But I did it! So as someone who managed it with very little in the way of previous experience, here is a beginner’s guide to how to climb Kilimanjaro.
(Disclaimer: it does take a few more than 10 steps to get to the top of Kilimanjaro!)

How to climb Kilimanjaro Step 1: Choose your route
There are six main routes up Kilimanjaro: Lemosho, Machame, Marangu, Rongai, Shira and Umbwe. They vary in length, difficulty, and duration – and different companies offer different routes, so you’ll need to choose your Kilimanjaro route before you pick the company you go with.
The trip can typically take 5-8 days: the longer routes are obviously more expensive but give you more time to acclimatise and therefore a much better chance of reaching the summit. They say on a 5-day route you have a 50% chance of making it, 60% on a 6-day route, and so on. So if you want to maximise your chances, go for a longer route.
Think about how fit you are and, if you have been at altitude before, how well you adjusted. If you’re used to exercise and you know you’re good with altitude, it’s not necessary to do an 8-day climb. But if you’re worried about your ability, it’s best to choose one of the longer routes to increase your odds of making it to the top.
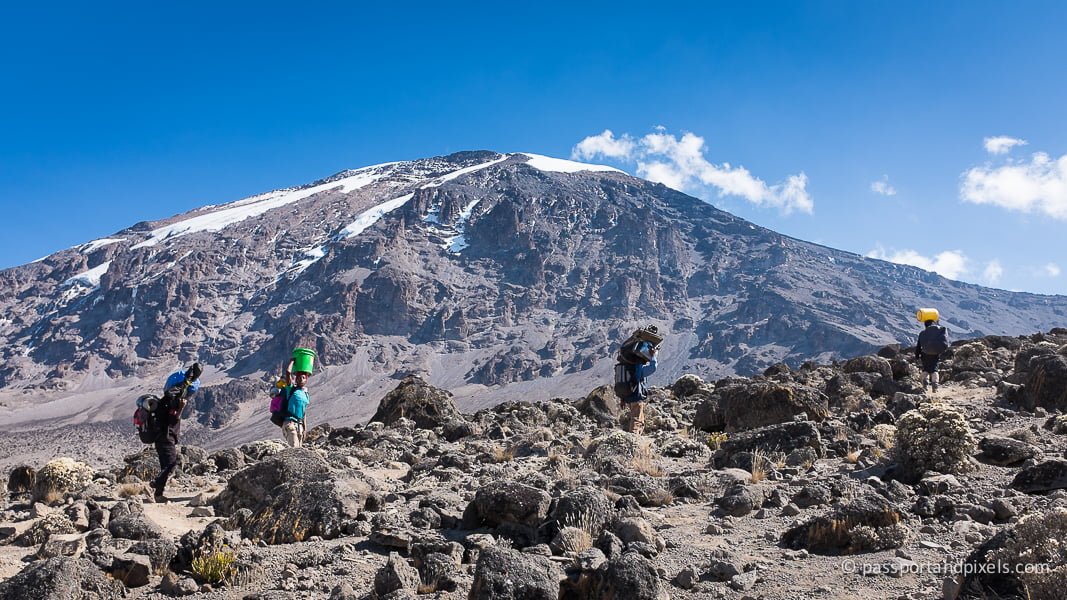
I chose the 8-day Lemosho Route because I wanted to have the best chance of reaching the summit, and I’d heard it was one of the more scenic and less crowded routes. Word has clearly spread because although it was indeed scenic, it was also pretty crowded! It was a great route and I’d certainly recommend it, but I didn’t find it particularly challenging and could absolutely have coped with a 7-day version.

Climbing Kilimanjaro Step 2: Choose your tour company or group
Once you’ve picked your route, you can now choose who to go with. There are lots of tour operators, both local and international, and they vary in price and service levels. Most of the big international operators use a local partner on the ground, so it’s a good idea to call them and ask who that is, so you can do some research.
It’s definitely worth paying a little bit more to go with one of the more established operators: you’ll get better food, better service, and better equipment – things like good quality tents, mats, and sleeping bags can make a huge difference! You should also make sure you book with a company that looks after its guides and porters and pays them properly.
I had heard really good things about the African Walking Company who have an excellent (and well-deserved) reputation. Their partner in the UK is Exodus Travels, so I booked through them.

The Kilimanjaro climb Step 3: Choose when to go
Obviously this will depend on your personal availability – but you also need to think about the weather and how crowded the mountain may be. The best time to climb Kilimanjaro is considered to be January-March and August-October which are the dry seasons. January-March is generally colder and you are more likely to encounter snow at the summit, but because of that it’s also quieter. I went in late September and we had sunny days and cold nights every day with not one drop of rain – but it was pretty crowded.
Once you’ve picked the time of year, I’d really recommend holding off booking until you see who else will be in the group. Most of the big tour operators run departures at least every couple of weeks in the peak seasons, and if you call them up they’ll happily tell you the demographic of the other people who have already booked.
It can make a huge difference to your enjoyment of the trip if you’re in a group with people of a similar fitness level and mindset: while you will obviously have the travel and adventure bug in common, it can still be hard if you’re a single with loads of couples, or a much younger traveller in a group where everyone is 30 years older. So hold off as long as possible and then book in with the group you think sounds like the best fit for you.

Climbing Mount Kilimanjaro Step 4: Train
Now you’ve booked, it’s time to prepare. The best training you can do is a combination of walking, cardio work, and strength exercises. There are lots of fitness plans online and some tour operators give them out too.
In the weeks leading up to your departure try to do at least one session of leg and core strength work, one session of cardio work like running or cycling, and one day of walking, ideally for several hours and involving some hills if possible.
This helps not only to build up the right leg muscles, but also ensures your boots are comfortable and a good fit. You don’t want to be finding out they give you blisters on Day One on the mountain!
If you can find one, working out once or twice a week in a pressurised altitude studio can really improve your fitness fast and help get you used to the feeling of being at altitude. But don’t freak out if you don’t have one nearby – you’ll be just fine with normal training too.
If you want to read more about how I planned and prepared for Kilimanjaro, head to How To Train For Kilimanjaro: A Complete Overthinker’s Guide.

Kilimanjaro hike Step 5: Shop and pack
Lists are the thing here. Make lists of the clothes, accessories, and toiletries you’ll need, and tick them off as you buy them. Most companies will give advice about what to bring, or you can read my own extensively researched packing list at An Overthinker’s Kilimanjaro Packing List.
Bear in mind when you’re booking that if you don’t already own much gear, and you don’t have anyone you can borrow it from, then the cost of buying everything you’ll need will add significantly to the price of the trip.
If you are shopping for new stuff, I’d highly recommend buying the best gear you can afford. Good quality hiking gear will not only serve you much better on the mountain, it will also stand the test of time and should last you a decade or more if you look after it.

Mount Kilimanjaro hike Step 6: Travel
So you’ve researched, planned, booked, trained, shopped and packed. If you’re anything like me, by now you’ll be both excited and terrified! As departure day approached, half of me was sick with fear and wanted to cancel the whole thing, and the other half was fed up of planning and just wanted to get on with it.
At this point the only thing you can do is just that. Get on with it, without over-thinking it. Book your taxi or get in your car, get to the airport, check in, board the plane, and off you go to bloody well climb Kilimanjaro! No turning back now!

Kilimanjaro climbing Step 7: Take it one day at a time
So now you’ve arrived and the trip is about to begin. Ahead of you is this enormous challenge: days of climbing up one of the world’s highest mountains, with things like the daunting Barranco Wall and terrifying Summit Night to contend with.
Will you make it? Might you get altitude sickness?? Will it be painful??! It’s easy to work yourself up into a state of panic worrying about all of this stuff, so you really must try not to.
Just take it one day at a time. Or even one hour at a time. If you only think about getting through the next stage, you’ll be fine. And you’ll be at the summit of Kilimanjaro before you know it!
To find out what the first few days were like, you could try reading:
- First Day | Kilimanjaro Lemosho Route 1
- The Forest Zone | Kilimanjaro Lemosho Route 2
- Shira Plateau | Kilimanjaro Lemosho Route 3

How to climb Kilimanjaro Step 8: Pole pole
You’ll hear this expression a LOT when climbing Kilimanjaro. It means ‘slowly slowly’, and it’s the Kili mantra. It can be all too tempting at the beginning, when you’re feeling fit and raring to go, to overdo it and exhaust yourself.
Many of the people who don’t make it to the top are not the less fit ones, but the strong and active people who were overconfident, overdid it, and exhausted themselves or got injured. So follow the guides‘ advice, take it slowly, and you’ll get there.
Find out more about the next few days here:
- Lava Tower | Kilimanjaro Lemosho Route 4
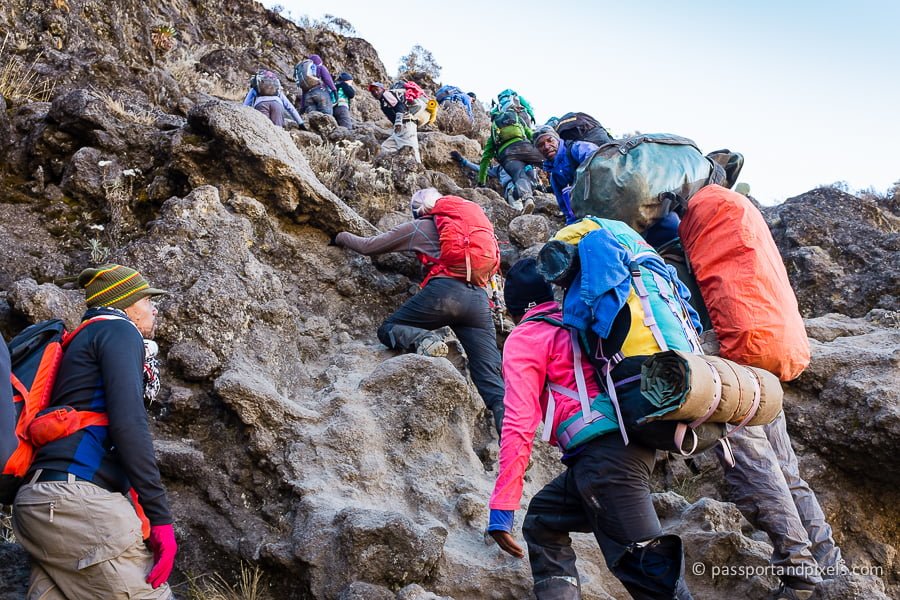
- The Terrifying Barranco Wall | Kilimanjaro Lemosho Route 5
- Base Camp | Kilimanjaro Lemosho Route 6
How to climb Kilimanjaro Step 9: Take the Kilimanjaro summit photo
You made it! Enjoy it… and make sure you get a decent photo. Don’t be rushed by the other people queueing for their turn. You won’t be able to come back and climb Kilimanjaro again if it didn’t come out right (well you could, but that’d be a very expensive photo!).
Luckily I still had enough energy to get the photo I’d been planning in my head for the last eight days…
Here’s how I got there: Summit Night | Kilimanjaro Lemosho Route 7

Mount Kilimanjaro climb Step 10: Have a well-deserved beer
It’ll be one of the best you’ve ever tasted! Enjoy your first shower in a week too – but if you’re sharing a room make sure your roommate doesn’t go first and use up all the hot water!
This actually happened to me, and yes, Sarah, I’m still grumpy about it!
Descent | Kilimanjaro Lemosho Route 8

Watch the video of what it was like to climb Kilimanjaro
If you want to see what it was really like to climb Kilimanjaro’s Lemosho route, here’s a little video I made of the experience.
Read more
There are links to loads more of my Kilimanjaro content dotted throughout this post, but if you want to read about some of my other outdoor adventures why not try these…?
- Ol Doinyo Lengai – Climb the Mountain of God
- Nyiragongo Volcano: Trek To The World’s Largest Lava Lake
- How to do the Polar Plunge in Antarctica
- Tandem Skydiving: Why I Hated Jumping out of a Plane
- The Thrilling Volcan De Acatenango Hike In Antigua Guatemala
Did you enjoy these tips for climbing Kilimanjaro?
Then why not share the love and Pin It! Thank you for supporting my blog!

Bella is a multi-award-winning travel writer, wildlife photographer and science and history documentary director from London. Among many awards and nominations she won Blogger of the Year at the British Guild of Travel Writers’ Awards 2023 and Best Photography at the Travel Media Awards 2020. Her work has been published by National Geographic, Wanderlust, and BBC Travel among others. Her films have been shown around the world including on the BBC, Discovery and PBS.


